
Kennedy Town Hong Kong: Find the Harbour Photo Spot from Exit C
The well-known Kennedy Town harbour photograph is taken from a fenced corner beside an upper basketball court. The approach begins outside MTR Exit C / 堅尼地城站C出口, goes up beside the station, passes a small children’s playground, enters a lower sports area and climbs again. The final turn around the upper court is easy to miss if the only picture you have is the finished sea view.
This guide covers that short approach, from the public street-side threshold of Exit C to the fence-side viewpoint. The photographs below show each choice. The route has steps, and the court is still a place where people play sport. Access restrictions and an active game take priority over a photograph.
Before following the route
- Start
- Outside Kennedy Town MTR Exit C, at the C panel beside the outdoor stairs. Kennedy Town is on the Island Line; the MTR’s official station-map page includes its location map and layout.
- Finish
- The permitted standing area beside the upper basketball court’s mesh fence, where the street and harbour line up between buildings.
- Venue hours
- LCSD lists Kennedy Town Playground, near Forbes Street, with two basketball courts open 07:00–23:00 daily. Current official court listing. On-site closures or restrictions can still affect access.
- Steps
- Two outdoor stair sections. This photographed approach is not a step-free route.
- What the photos show
- The annotated main sequence was published on 24 October 2025. Its landmarks have been compared with 2026 visitor photographs, including a recent report of the playground approach. The court, fences and vegetation can change.
Start with the Exit C photograph. The guide ends at the fence-side harbour viewpoint.
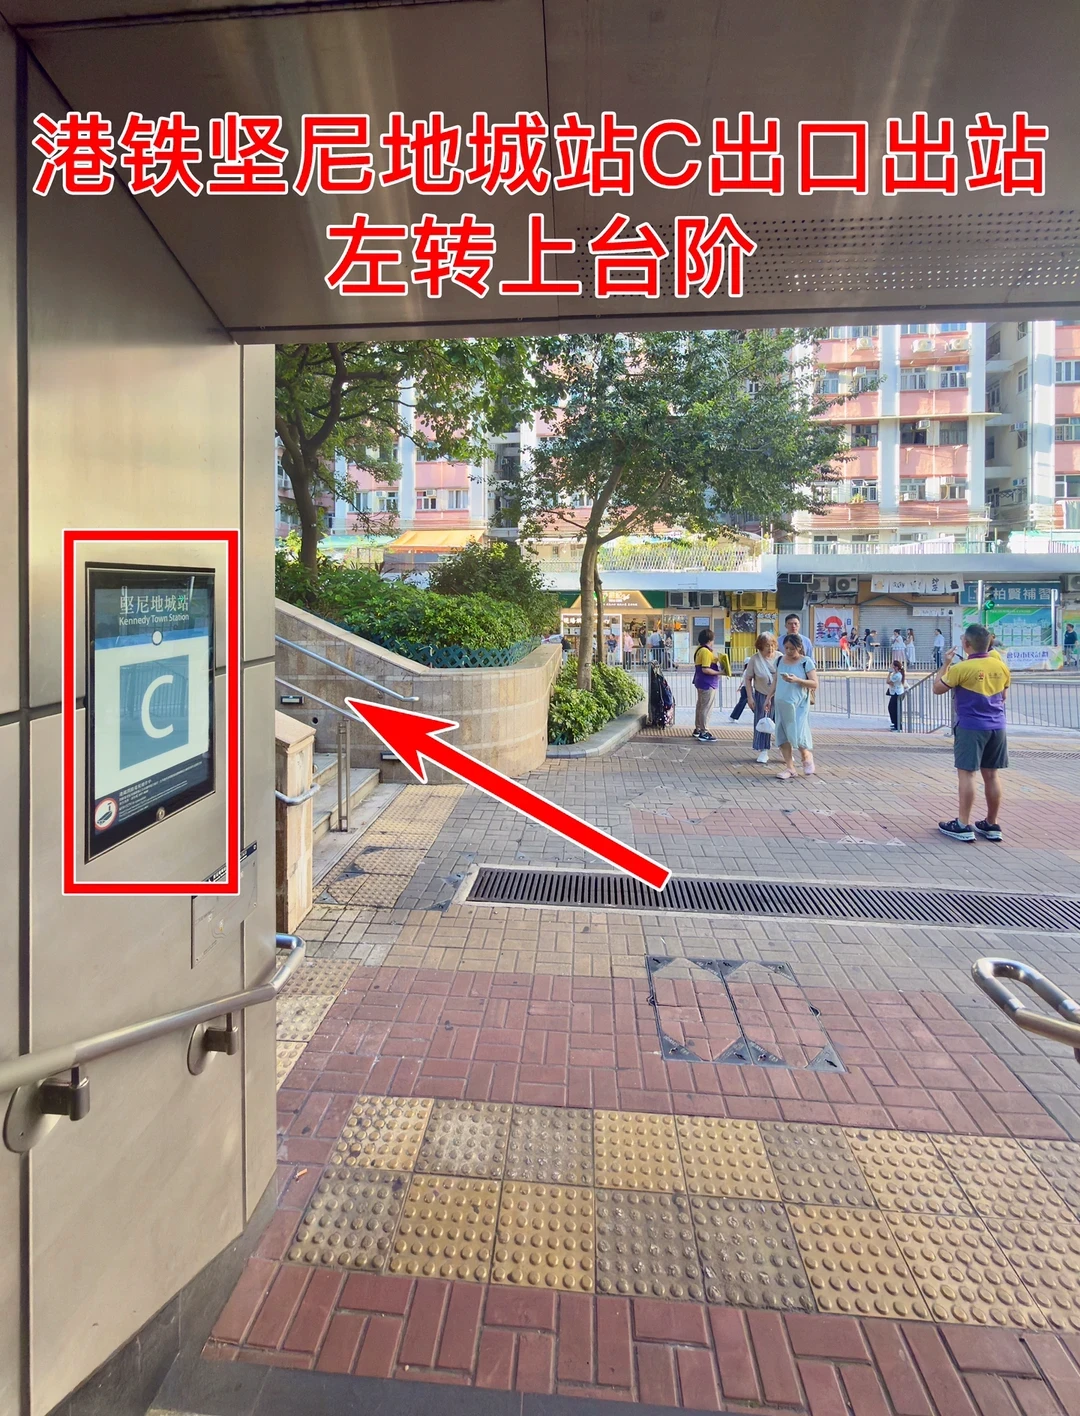
1. Start outside Kennedy Town Exit C and turn left
Start at the street-level doorway of Kennedy Town station, Exit C / 堅尼地城站C出口. The large blue-green C panel is your first check. With your back to the station doorway, turn left towards the outdoor stairs immediately beside the building. The harbour view is above this small park. The street in front of the station is not the first part of this approach: the photographed left turn takes you to the stair railings.
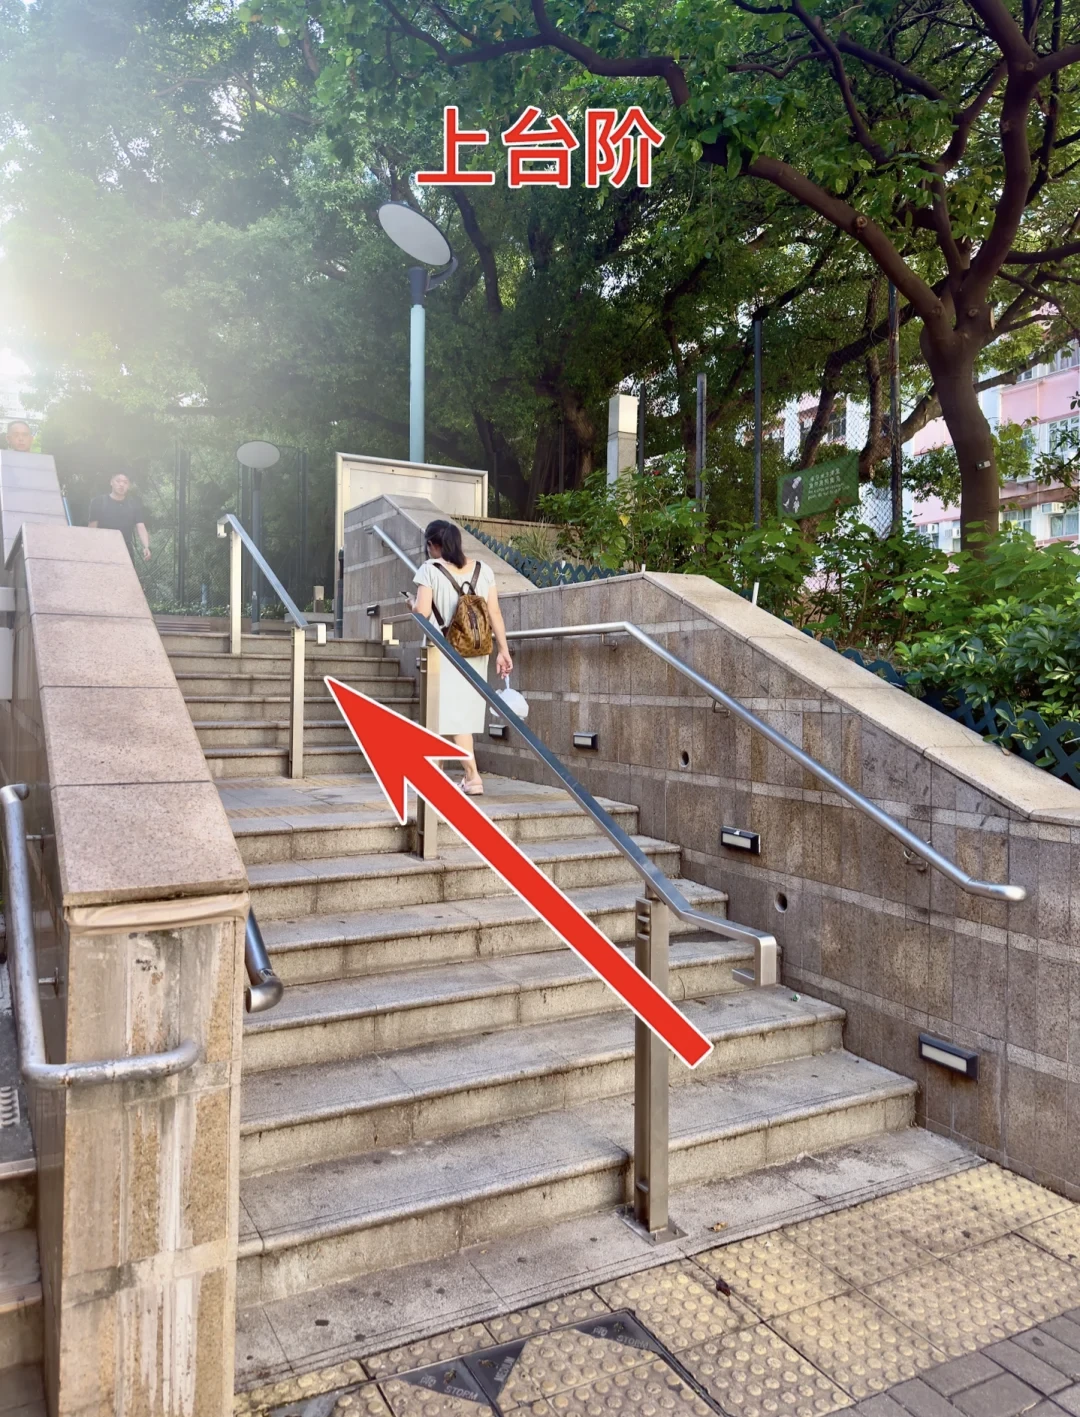
2. Climb the stairs beside the station
Go up the outdoor stair section shown below. There are metal handrails, pale stone walls and trees above the landing. The staircase stays beside the station building; it is not the stairway back down into the MTR. This route has two outdoor stair sections, so it suits visitors who can manage steps.
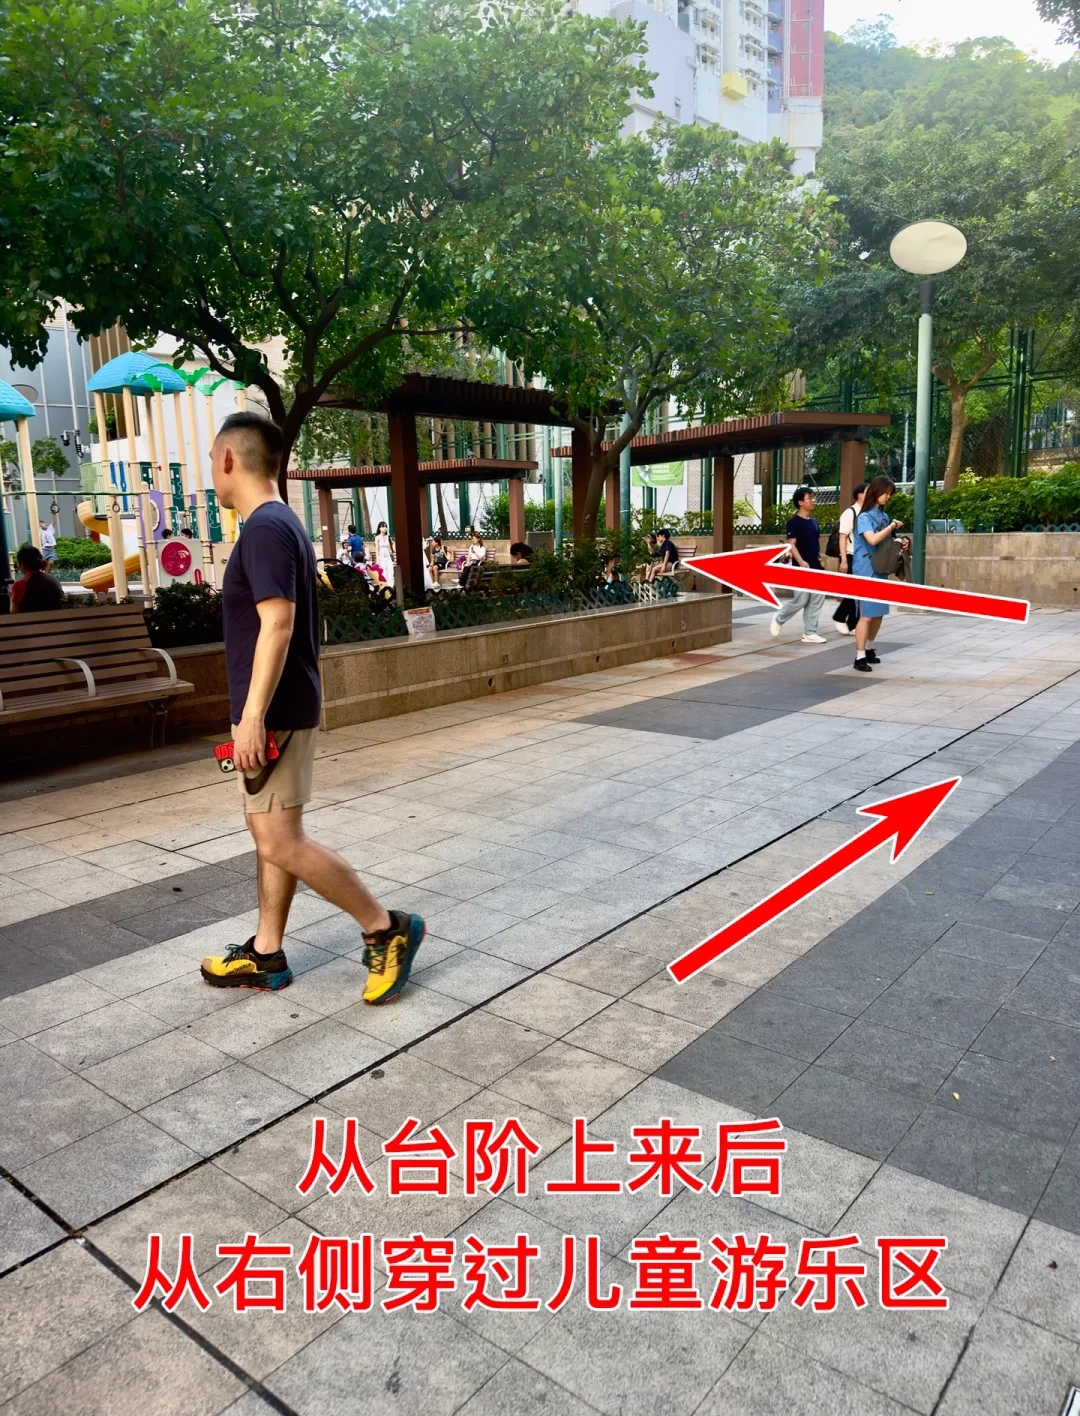
3. Turn right onto the paved path
At the top, turn right onto the wide paved path around the children’s play area. The colourful play equipment and low planted beds should be on your left as you begin following this path. Use the path around the equipment, leaving room for children and the people using the benches. The arrows in the photograph show the route along the paving and its bend towards the far side of the play area.
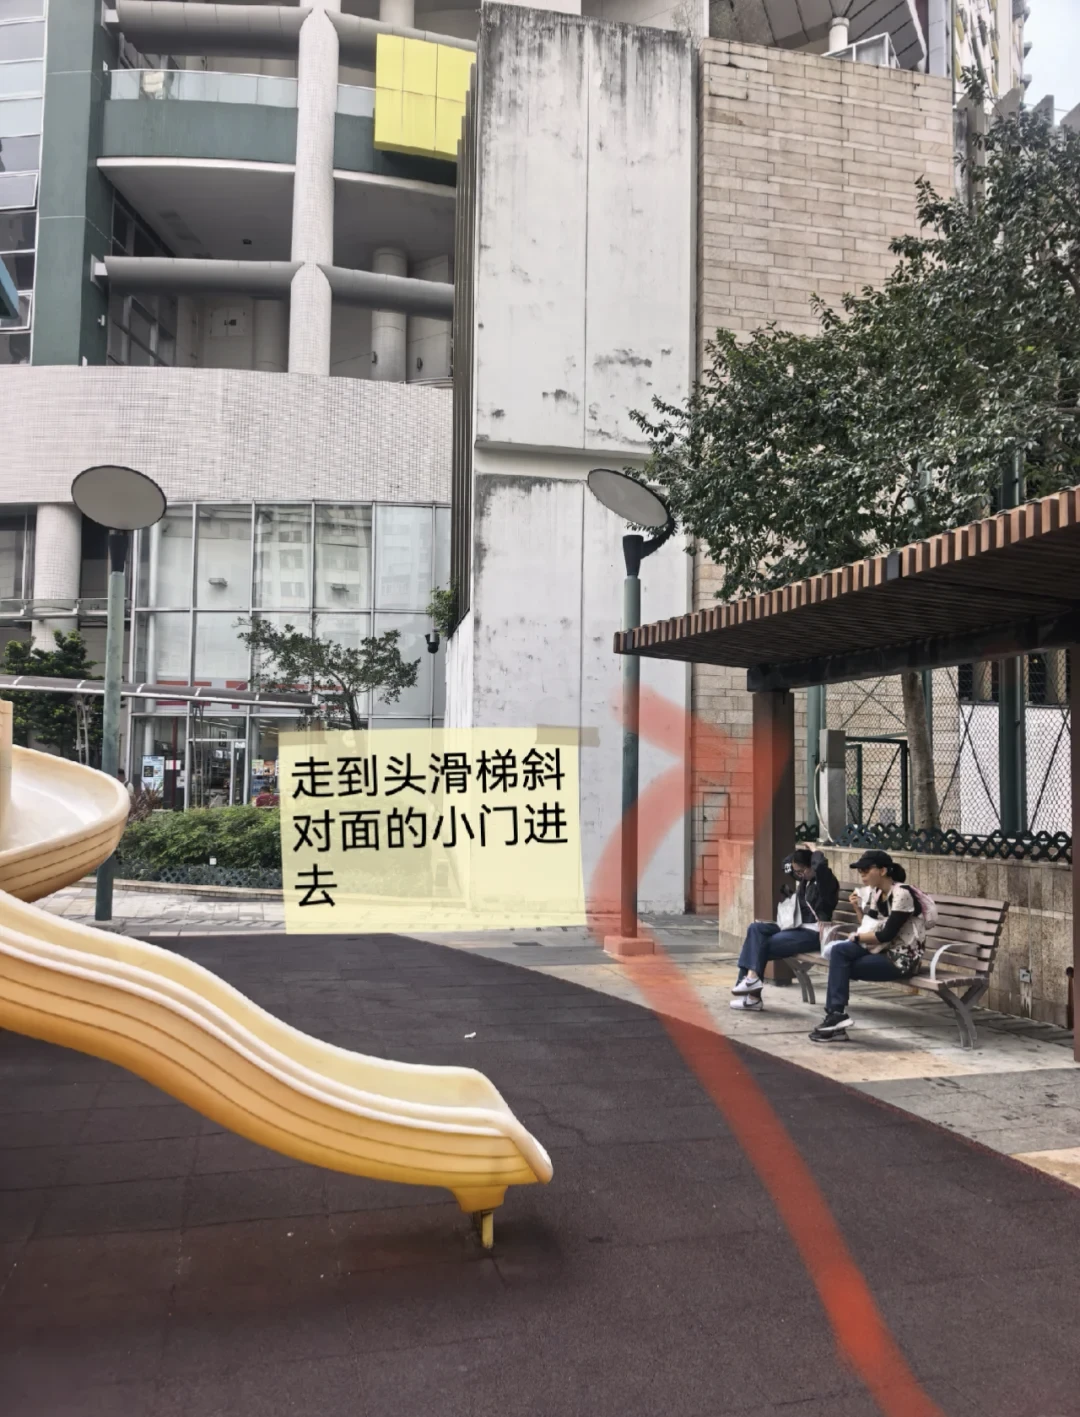
4. Follow the path to the green court gate
Continue past the play area towards the tall green fence on its far side. This recent visitor photograph shows the yellow slide on the left, the covered sitting area on the right and the route angling towards the court entrance ahead. The marked path helps with a point that short descriptions often skip: you have to get around the play area before reaching the gate. The following close view shows the exact doorway in that fence.
5. Go through the open gate when access is permitted
The entrance is the tall green mesh gate in this photograph. There is a noticeboard on the fence, a red perimeter strip beyond the opening and a white wall on the left inside. Enter only while public access is open and permitted. If the gate is closed or a notice or staff instruction restricts entry, stop outside here. Court use and on-site access directions take priority.
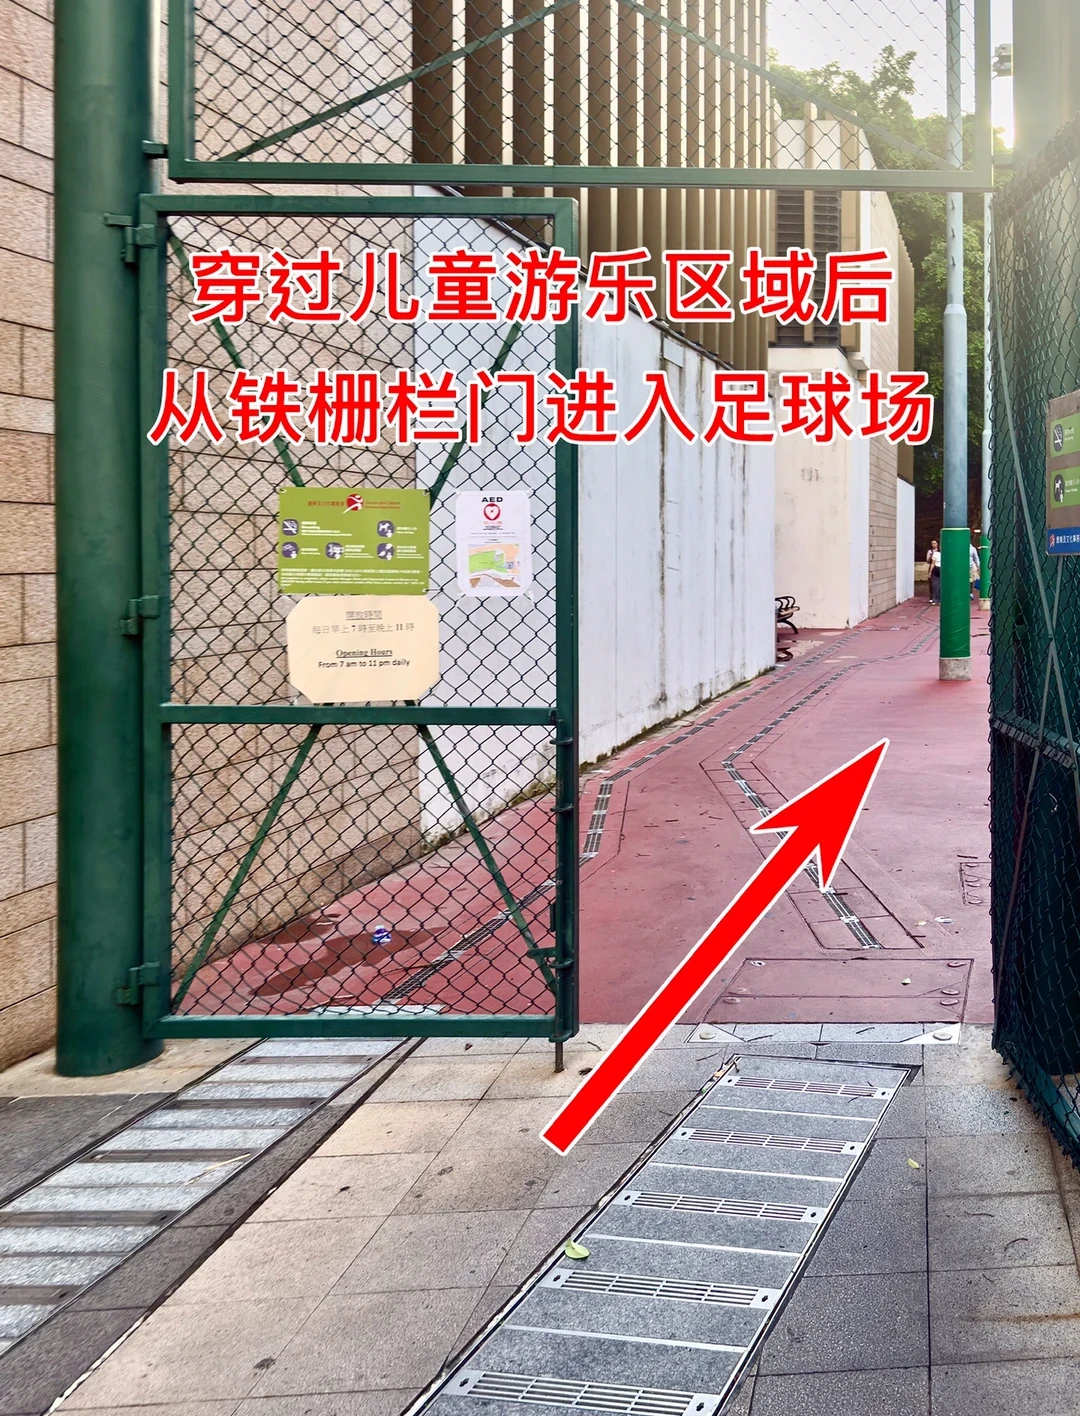
6. Follow the lower court’s outside edge to the far stairs
After entering, continue along the red perimeter beside the white wall, with the green playing area to your right. The next stairs are at the far end, beside the large tree and stone retaining wall. Keep to the outside edge instead of cutting across the playing surface. This lower sports area is an intermediate level: the harbour-view basketball court is still above it. If an active game makes the pictured perimeter unavailable, stop rather than crossing through play.
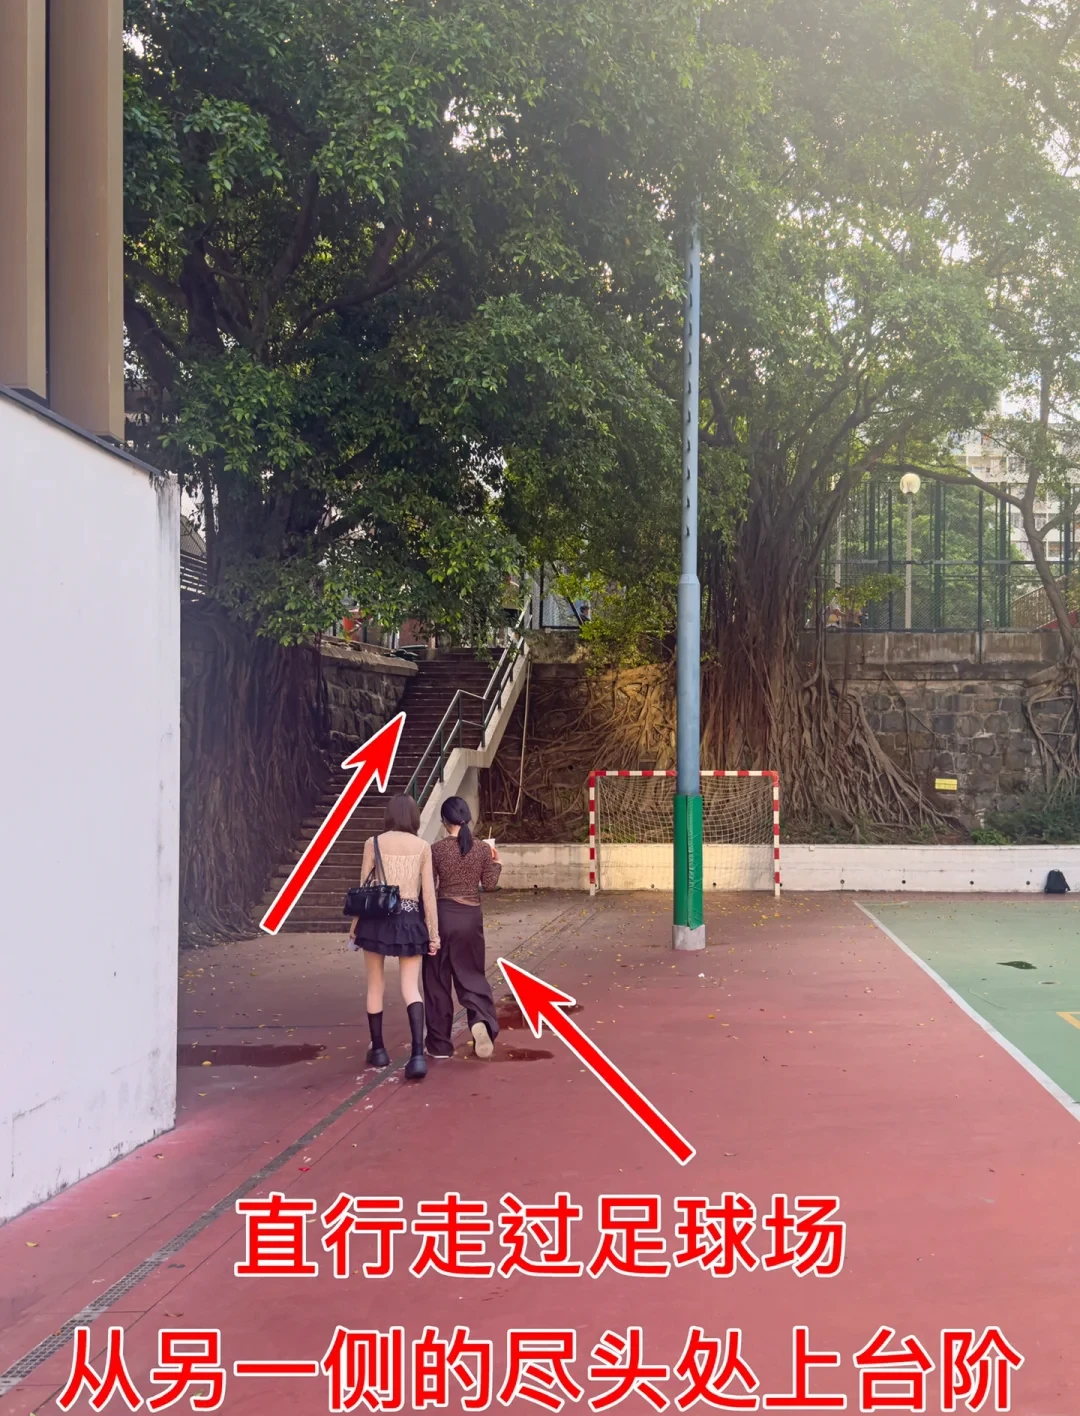
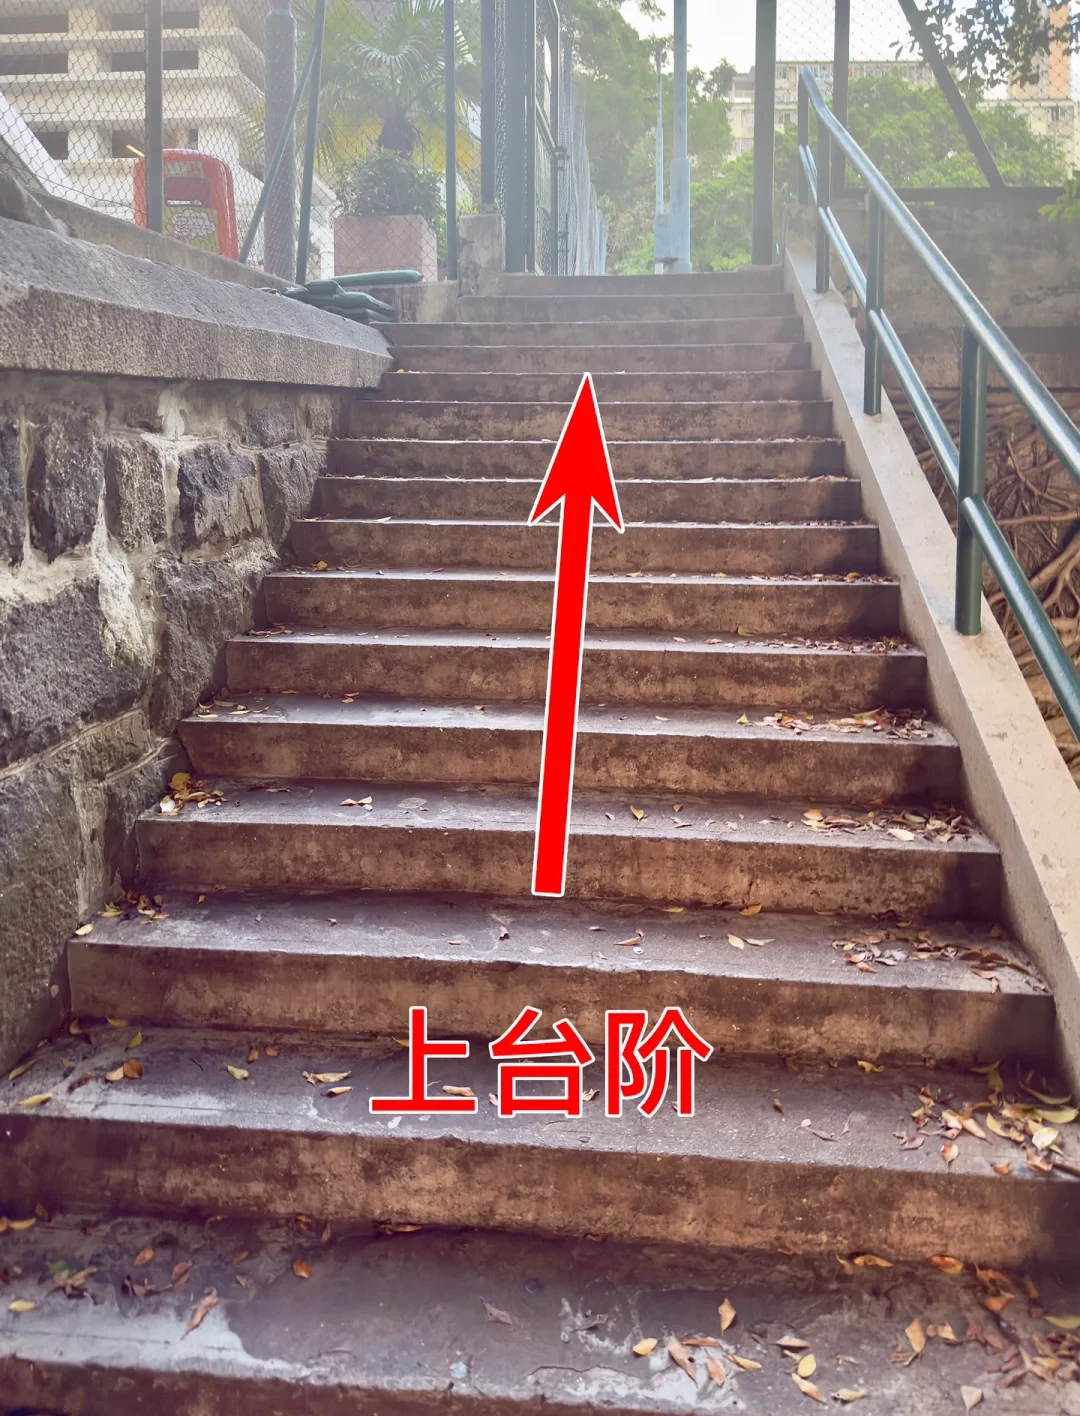
7. Take the steps beside the tree
Go up the stone steps between the large tree and the retaining wall. The handrail and yellow stair edges in the close photograph are useful checks. This is the second climb in the approach. Its top opens beside the upper basketball area, where another change of direction follows; reaching the top of the stairs is not yet the final camera position.
8. Turn right around the basketball court
At the upper landing, take the route on the right-hand side of the fenced basketball court. The green court is on the left of this view. A small red-and-yellow play structure and benches sit beside the path on the right. Follow that outer path around the side of the court. The arrows indicate this change of direction; the photo position is farther along the fence.
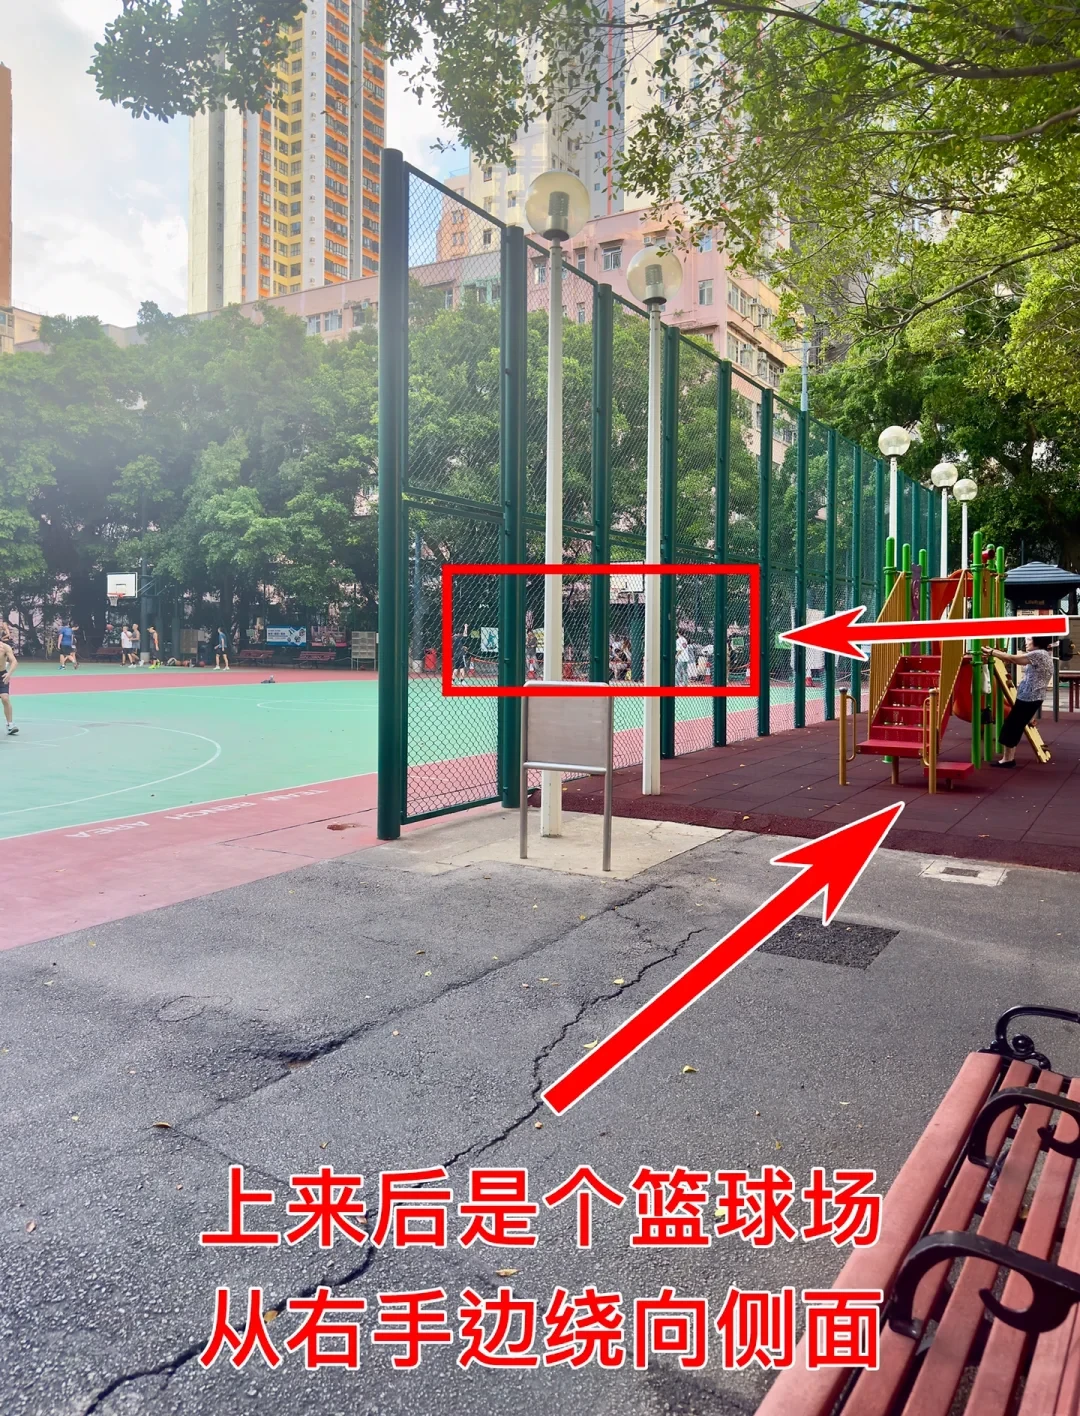
9. Continue along the fence to the viewing corner
Continue beside the green mesh fence, past the play structure towards the benches and the corner shown in the photograph. People often gather at the far end, but the permanent checks are the fence, the path around it and the gap between the buildings beyond. Crowds can move, and the available space depends on people using the court. Keep the circulation path clear as you approach.
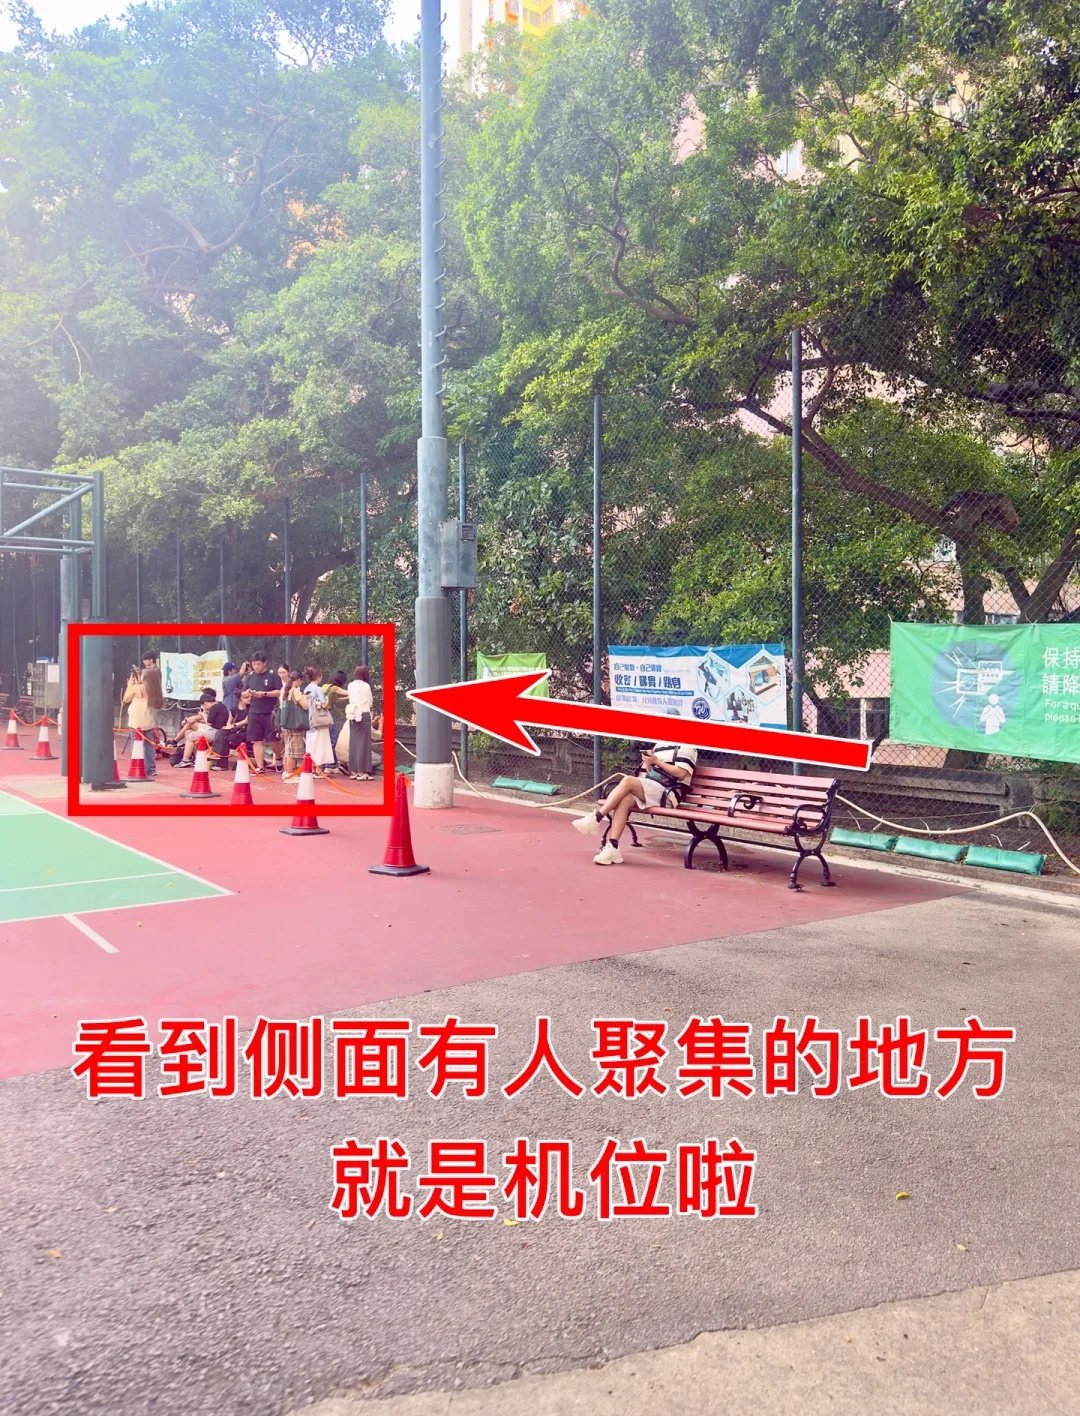
10. Wait for a clear standing place at the mesh
The real view of the photo spot is a fenced corner beside a working sports court. This photograph shows visitors waiting along it, with the court and its users close by. When the available standing space is occupied, wait without blocking the path or stepping into play. A clear place here is the next checkpoint, rather than a particular queue length or a guaranteed wait time. People playing sport need the court and its circulation space.
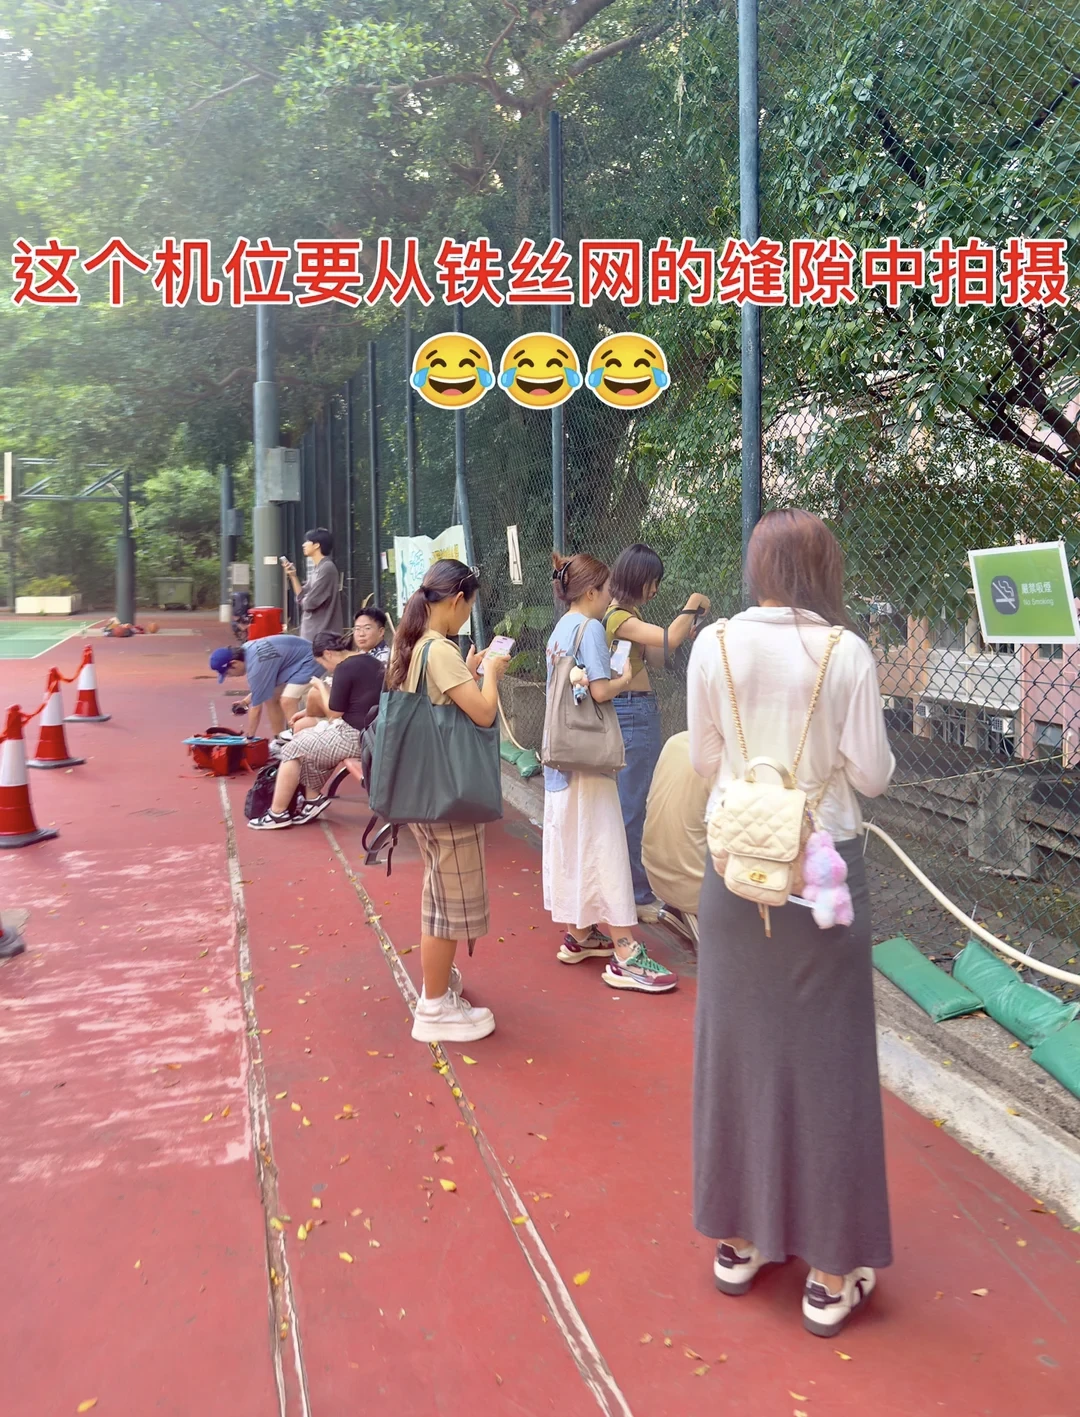
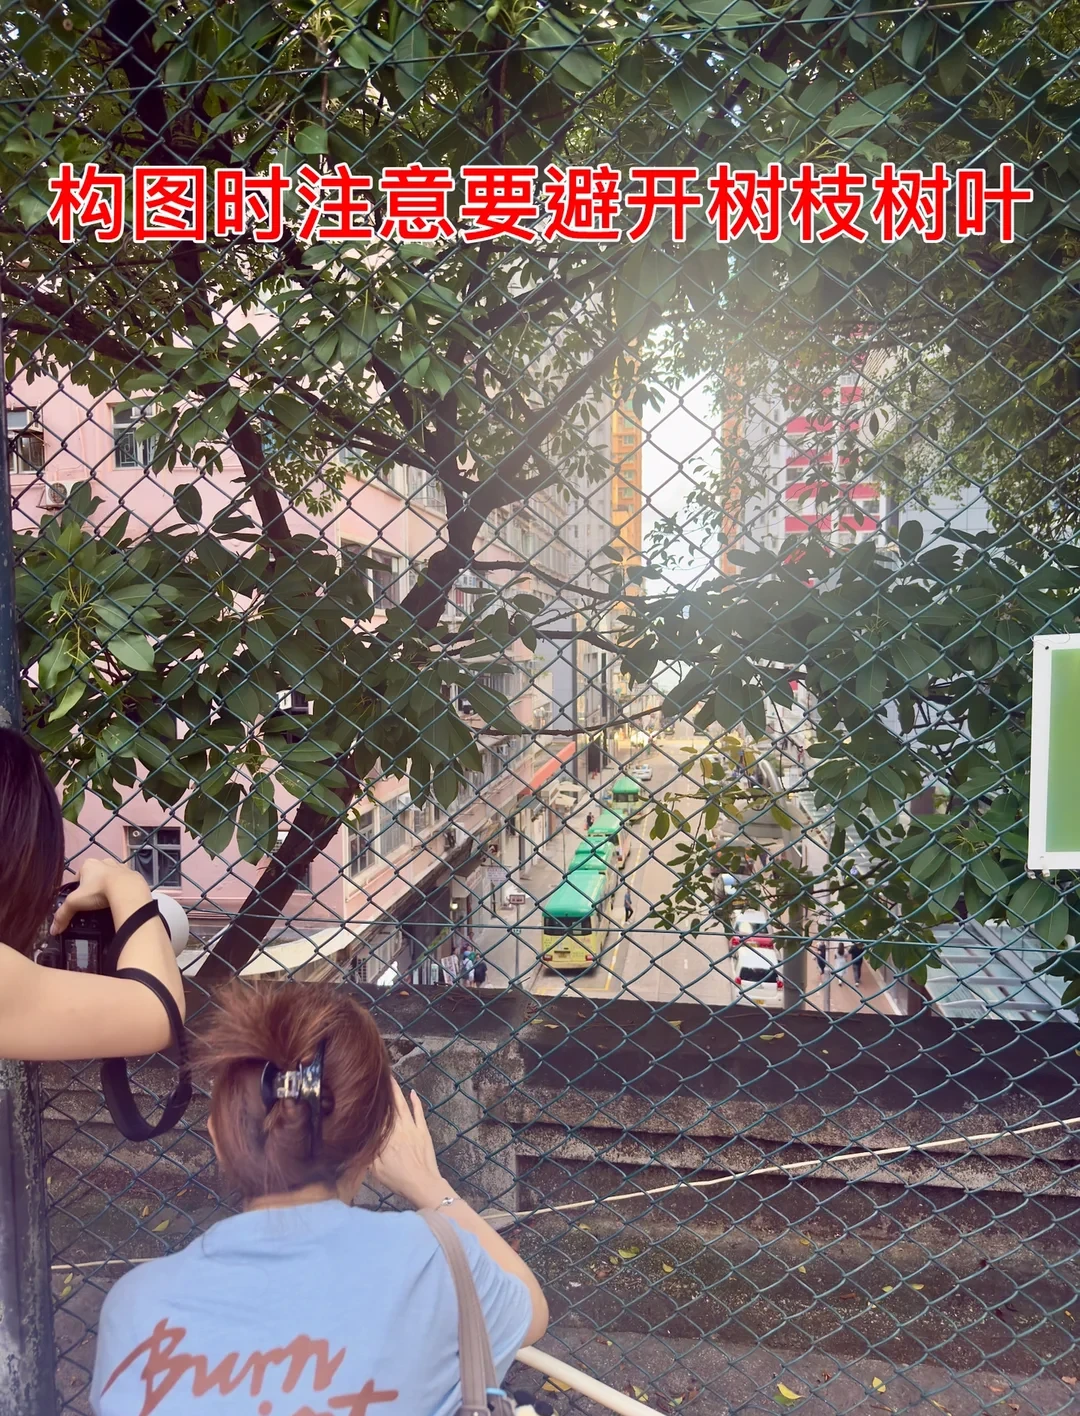
11. Find the street-and-sea sightline through the fence
From the permitted standing area, look through the existing mesh opening towards the street and water. The fence-level photograph shows why the position matters: branches and leaves partly interrupt the view. The useful sightline is between the buildings, below the foliage. Keep your feet on the path and your equipment on your side of the fence. Do not cut, enlarge or climb the mesh. A clear view depends on the particular opening, vegetation, weather and people around you.
12. Confirm the view: buildings, street traffic and the harbour
The finish is the view down the street between tall apartment blocks, with traffic below and the harbour beyond. This photographed example shows those layers together. The distant hills and water are the final visual check that you have found the intended angle. The close framing comes from a long lens or cropped view; a wide-angle phone photograph will include much more of the fence and surroundings. Traffic, boats and visibility will vary.
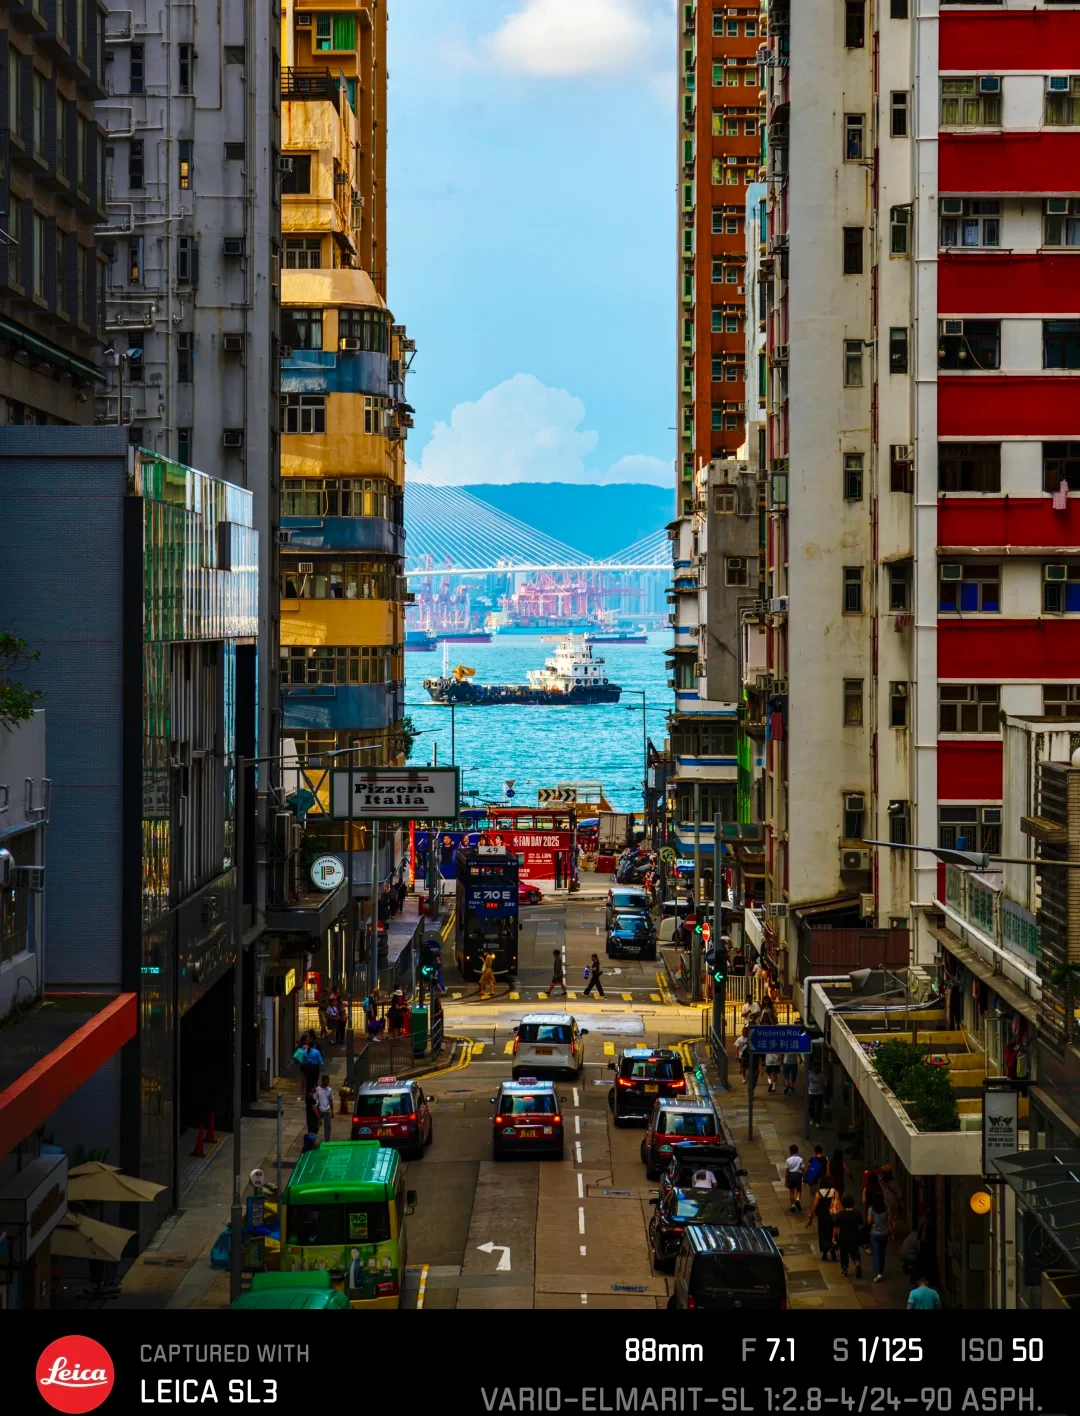
You have found the right place when you are beside the upper-court fence and can see a traffic-filled street framed by apartment blocks, with the harbour at its far end. The nearby court, green mesh and overhanging branches are part of the real setting. The finished, tightly framed photograph leaves much of that setting outside the picture.
A blocked or restricted gate means this approach cannot be completed at that time. The gate photograph in step 5 is the decision point.
Official opening details checked 19 November 2026. Route photographs are credited in their captions.
Questions and updates
Comments may be reviewed before they appear.
Your comment and chosen name may be published. We store your IP address and browser details to help moderate comments.